It is desirable for you to secure the means to connect to the Internet before you leave Narita International Airport. Suppose you take bus to Tokyo and get off at the bus stop.

Around Tokyo bus stop
By consulting Google maps, you know where you are, and which direction you have to go to get your hotel. Without the Internet connection, you hardly know where you are and which direction you have to go.
Means to connect to the Internet
There are several ways to connect to the Internet. First way is to use the roaming service of your mobile service company. Second way is to buy a prepaid SIM and replace it with the SIM in your phone. Third way is to rent portable Wi-Fi router. Fourth way is to connect to the Internet at Wi-Fi spots (free or paid).
The mobile phone networks
The mobile phone networks are the most reliable and they provide the most extensive coverage. By using mobile phone networks you can connect to the Internet wherever you are in Japan. The coverage of wireless networks for portable Wi-Fi routers is smaller (though most of big cities are covered) than that of the mobile phone networks. So, using roaming service or prepaid SIM and connect to Wi-Fi when usable (like at the hotel) is desirable combination to connect to the Internet. But using mobile phone networks costs you.
Before the end of roaming surcharges in the EU on June 14, 2017, prepaid SIM was the cheaper and reliable way to connect to the Internet when EU residents visit to foreign European countries. And it is still true in most Asian countries.
But in Japan, as I show you later, prepaid SIM is very expensive. Besides, most of the mobile service companies provide only data communication service. So it may be wise to compare the cost of purchase of SIM with that of roaming service beforehand.
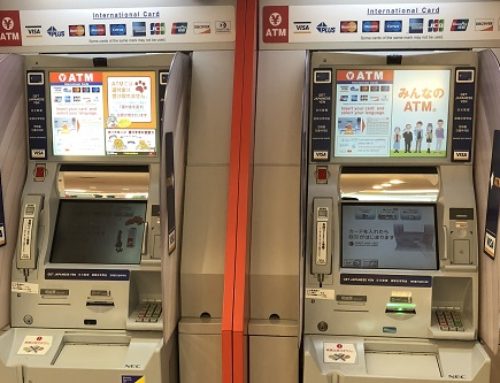
Prepaid SIM and Wi-Fi router
Rental fee of Wi-Fi router is about 1,000 yen per day. Accordingly, if you use it for 5 days, it costs you about 5,000 yen. You can rent it at SoftBank Global Rental, AnyFone JAPAN, Mobile Center, Telecomesquare and other Wi-Fi router rental counters.
Considering you moving around, using roaming service, prepaid SIM or renting Wi-Fi router is far more convenient than using free Wi-Fi spots, moreover, they are more secure.
Prepaid SIM is expensive in Japan
Unfortunately, prepaid SIM cards in Japan are expensive comparing with Asian countries and European countries. Besides, there are only a few prepaid SIM cards with voice service plan in Japan. Practically prepaid SIM card without voice service is your option (except you can afford very expensive SIM card with voice service).
Generally, SIM cards bought at Airport are more expensive than those bought in town. But there are a few shops at the Airport (Air Bic CAMERA and convenience stores) that sell SIMs with the same price in town.
MNO (Mobile Network Operator) and MVNO (Mobile Virtual Network Operator)
Roughly speaking there are two kinds of mobile network operators. One is MNO (Mobile Network Operator) that owns wireless network facilities and operates network service. The other is MVNO (Mobile Virtual Network Operator) that borrows wireless network facilities from MNO and operates network service using these facilities.
Generally, MNOs provide higher quality mobile network service or more stable mobile network service. During busy mobile network traffic hours (like around lunch hour), MVNO’s traffic speed slows down. If you want stable mobile communication, MNO’s SIM is recommendation.
If your phone is iPhone and if you buy MVNO’s SIM, usually you need to download the configuration profile file from the MVNO’s website and install it to set up APN, which means your iPhone must be connected to Wi-Fi. As you can connect to Free Wi-Fi at Narita Airport, you could set up or activate your iPhone at the airport even if you buy MVNO’s SIM.
Two MNOs offer prepaid SIM in Japan
If you want stable data communication, recommendation is to buy MNO’s prepaid SIM. Two MNOs provide prepaid SIM without voice service. One is NTT DOCOMO, the other is SoftBank.
Procedures to buy NTT DOCOMO’s SIM are troublesome. First, before you arrive in Japan, you have to open “d account” of DOCOMO in your country, then have to select your preferred SIM plan, and decide when and where you pick up the SIM in Japan. After arriving in Japan, you receive your SIM at reserved shop, and activate it. Other prepaid SIMs do not need such beforehand procedures in your country.
Procedure to buy SoftBank’s SIM is simple comparing with NTT DOCOMO. After arriving in Japan, just go to the one of the shops where sell SoftBank’s SIM, then buy and set it in your phone (Android phone need to be set up APN manually), then you have to register your information through mobile network system (your passport picture must be uploaded).
Since procedure for buying DOCOMO’s prepaid SIM is complicated, my recommendation is to buy SoftBank’s prepaid SIM if you want to buy MNO’s prepaid SIM.
SoftBank’s prepaid SIM – Prepaid SIM for Travel
SoftBank provides only one plan for prepaid SIM for tourists (called “Prepaid SIM for Travel”), it is 3GB data-only service for 31 days (3GB plan is applied during unspecified campaign period). At Narita International Airport, you can buy it at Air BIC CAMERA store or SoftBank Global Rental counters.

SoftBank SIM
Above picture you read 1GB, but 3GB plan is applied. 3GB is printed on the newer package.
Price is quite different whether you buy the SIM at Air BIC CAMERA store or at SoftBank Global Rental counters at Narita Airport. Price at Air BIC CAMERA store is less expensive than at SoftBank Global Rental counters (2,678 yen vs. 4,500 yen). APN setting and the registration is not difficult. So “Prepaid SIM for Travel” at Air BIC CAMERA is a good buy.
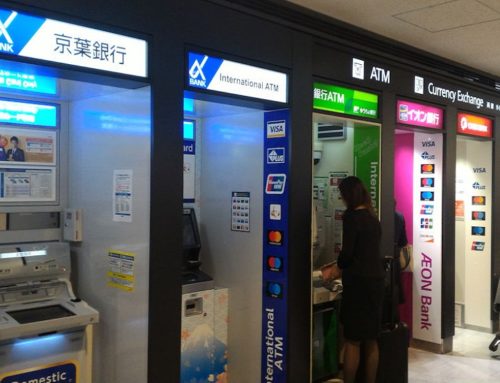
Unfortunately, Air BIC CAMERA is only located on the 4th floor in Terminal 2. You have to go there if you want to buy it at Air BIC CAMERA. SoftBank Global Rental counter is at the arrival lobby on the first floor in Terminal 1 and 2.
Procedure to get “Prepaid SIM for Travel” usable

SIM setup instruction
Turn off the power of your phone. Then replace the SIM of your phone with SoftBank’s SIM. Turn on the power of the phone. For iPhone, APN is automatically set up. If you want, check if 4G is on. For Android, you set up APN manually according to the instruction of the manual.
Then connect to “My SoftBank” by scanning QR code or typing URL on the manual in browser. You have to turn off Wi-Fi or disconnect Wi-Fi during the procedure. After connecting “My SoftBank”, you type in the registration information and upload the picture of appropriate passport page. After sending the information, the registration completion notification will be sent to you within 30 minutes (usually within a few minutes).
NTT DOCOMO’s prepaid SIM – Japan Welcome SIM & Wi-Fi
NTT DOCOMO offers six plans. For all plans, service period is 20 days. Out of six plans, I think practical ones are plan L (1.2GB, 2,376 yen ($21.4) and plan XL (2GB, 3,024 yen ($27.4). You can use NTT DOCOM Wi-Fi with no additional cost if you purchase DOCOMO’s prepaid SIM. For all plans refer to “Japan Welcome SIM & Wi-Fi” web site.
As I said before, procedures for buying DOCOMO’s SIM are basically two steps.
First, in your country, you create an ID (d ACCOUNT) at the application website, , choose a plan and SIM exchange place, and make an application with your credit card. Then a SIM exchange code is issued.
Second, in Japan, exchange the SIM at an airport exchange place or other by showing the staff your SIM exchange code (QR code). then activate and start to use the service.
SoftBank’s “Prepaid SIM for Travel” is the better choice
SoftBank’s “Prepaid SIM for Travel” is more cost efficient than DOCOMO’s “Japan Welcome SIM & Wi-Fi” (893 yen/GB vs. 1,512 yen/GB, 28.8 yen/GB/day vs. 75.6 yen/GB/day except Wi-Fi). And SoftBank’s procedure for purchase is simpler.
If you want stable data communication, SoftBank’s “Prepaid SIM for Travel” is the better choice unless you appreciate DOCOMO’s secured Wi-Fi connection.
Other choices – MVNOs’ prepaid SIMs
If you don’t mind stable data communication speed, MVNO’s prepaid SIM come into your choice. Which prepaid SIM you should choose depends on what aspect you regard as important.
Choice from economical viewpoint
From economical viewpoint, there may be two viewpoints. One is cost efficiency viewpoint, the other is the total cost you have to pay.
From cost efficiency viewpoint, we can rank prepaid SIM as follows (based on cost/GB):
- Visitor SIM (3,380 yen, 5GB, 21 days, by b-mobile) 676 yen/GB, 32.2 yen/GB/day
- Prepaid SIM for Travel (2,678 yen, 3GB, 31 days, by SoftBank) 893 yen/GB, 28.8 yen/GB/day
- Japan Travel SIM (3,024 yen, 3GB, 30 days by IIJ ->click full MVNO version) 1,008 yen/GB, 33.6 yen/GB/day
Above SIMs can be topped up data volume.
From the total cost viewpoint, the ranking is as follows:
- Japan Travel SIM (1,998 yen, 1.5GB, 30days by IIJ -> click full MVNO version) 1,332 yen/GB, 44.4 yen/GB/day
- Japan Welcome SIM & Wi-Fi (2,376 yen, 1.2GB, 20days by NTT DOCOMO) 1,980 yen/GB, 99 yen/GB/day
- Prepaid SIM for Travel (2,678 yen, 3GB, 31 days, by SoftBank) 893 yen/GB, 28.8 yen/GB/day
Note: IIJ’s Japan Travel SIM has two version, full MVNO version and light MVNO version. full MVNO version is new one.
Choice from other view points
If you like the simplest procedure to use SIM, “Prepaid Data SIM” by u-mobile is the choice. You don’t have to register any information at all, all you have to do is just replace SIM and set up APN. But it’s more expensive than above SIMs.

u-mobile vending machine
If you are heavy data user and want unlimited GB, “Prepaid Data SIM for Japan” by AnyFone is the choice. But they are expensive. They are 7,500 yen (7 days), 8,000 yen (10 days), 8,500 yen (15 days), 9,500 yen (30 days). u-mobile also sells unlimited volume SIM (price is about 4,320 yen, 7 days).
If you want voice service, “Wi-Ho Prepaid SIM (Y-mobile)” by Telecom Square is the option. They are very expensive, 5,500 yen (1GB, 15days), 7,500 yen (3GB, 15days). They are for domestic use only. You can’t call abroad from Japan and they can’t even use SMS in spite of such expensive prices.
You can find other MVNO’s SIMs. Use above lists for comparison and judge which one is your best choice.
As a whole, I think “Prepaid SIM for Travel” by SoftBank is the best choice. It provides more stable data communication speed and better cost efficiency.
Where can you purchase prepaid SIMS?
“Prepaid SIM for Travel”, “Visitor SIM”, “Japan Travel SIM” can be purchased at Air BIC CAMERA on the 4th floor in Terminal 2.
You can buy “Prepaid Data SIM” by u-mobile at vending machine on the 1st floor in Terminal 1 and 2.
You are able to purchase “Prepaid Data SIM for Japan” by AnyFone at SoftBank Global Rental and/or AnyFone JAPAN on 1st floor in Terminal 1 and 2 and on B1F in Terminal 2.
“Wi-Ho Prepaid SIM (Y-mobile)” can be purchased at Mobile Center on B1F in Terminal 1 and 2 and on 2nd floor in Terminal 3, and at Telecomesquare on 1st floor in Terminal 1, and 2nd floor in Terminal 2.
Air LAWSON (convenient store) on the 4th floor in Terminal 1 sells several kinds of SIMs.
Note 1: If you use iPhone, if you already installed configuration profile of MVNO in your country, and if Japanese MVNO’s SIM requires installation of configuration profile, delete the old configuration profile before installing new configuration profile, because Apple permits only one configuration profile for APN setting.
Note 2: If you use iPhone and have to install configuration profile for APN setting, you need to connect to Wi-Fi. At Narita Airport, to use free Wi-Fi, 1 turn on Wi-fi function on your phone, 2 find and tap SSID “FreeWiFi-NARITA”, 3 select language, 4 agree with the Terms & Conditions, 5 agree about security.
Leave A Comment